Oh my gosh, I just started Wolves' Life 3 and the music is so nice!!! They also just updated the animation quality a little bit and improved the graphics. I can already feel today's post is gonna be good! 🐺
Hello there Robloxians! Today I'm going to show you how to make great looks on Wolves' Life 3, no gamepasses necessary!
---
Step 1 - Pick if it's a boy or girl. This will change the eyelashes, so I'm keeping mine a boy, which is default.
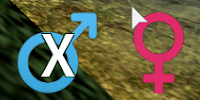 |
| Gender buttons |
 |
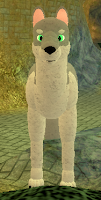
| Girl wolf example (eyelashes) |
 |
| Boy wolf example |
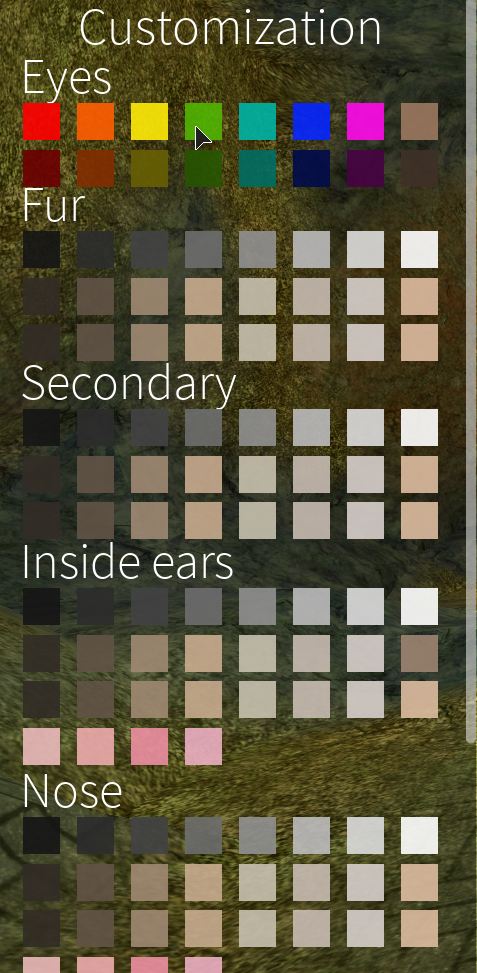
Step 2 - Color your wolf. It is helpful to use advanced editing if you want your wolf to be more unique and alive, such as spots, stripes, or a gradient tail.* I will make mine brown and golden brown with a gradient tail. You can also change the eye color, which I am making plain green. (And with the extra colors gamepass, you can make your wolf all sorts of rainbow colors.)
 |
| My wolf colors |
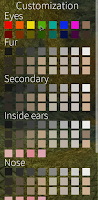 |
| Color customization |
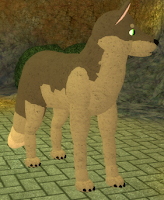
Step 3 - Add fur details so your wolf doesn't look flat. I will add everything except chubby cheeks, fat, ear fluff, and jaw fluff. Wolves without fur details look incomplete.
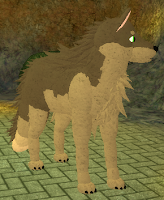 |
| My wolf after fur details |
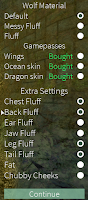 |
| Fur customization |
Step 4 - Add accessories. None of them cost extra money, they are all free! There are four categories- hair, torso, piercings, and feet. Hair has a variety of hair options, torso has torso/back accessories, feet has foot and arm accessories, and piercings has various piercings. I will add swiped back hair (brown), sword 2 (original color), and slider bracelets (grey, plastic).
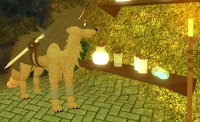 |
| Finished wolf photoshoot! |
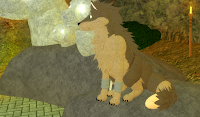 |
| Finished wolf photoshoot! |
Step 5 - You're done! You can add particle effects for pawcoins, and they don't require robux (you get 50 pawcoins every 5 minutes). You should prooobably add a name and a bio, unless your wolf is nameless?
*How to do gradient tail - First, you need to know the numbers of the tail parts. Tail 1 is the start of the tail, tail 2 is the next, then tail 3, tail 5, and tail 6, which is the tip. (There is no tail 4, so tail 5 is basically tail 4.) Color each tail part individually to create a gradient from light to dark. If you have the extra colors gamepass, you can do a rainbow tail, like my OC Finnie has!
Thank you for reading Robloxians!


No comments:
Post a Comment
Type a comment that follows the commenting rules below.